Setting up a recurring invoice is similar to creating a regular invoice. You pick a client, add your line items, and then set the schedule for how often it should repeat.
- 1
Go to Recurring Invoices
Click Recurring Invoices in the left sidebar, then click "Create Recurring Invoice".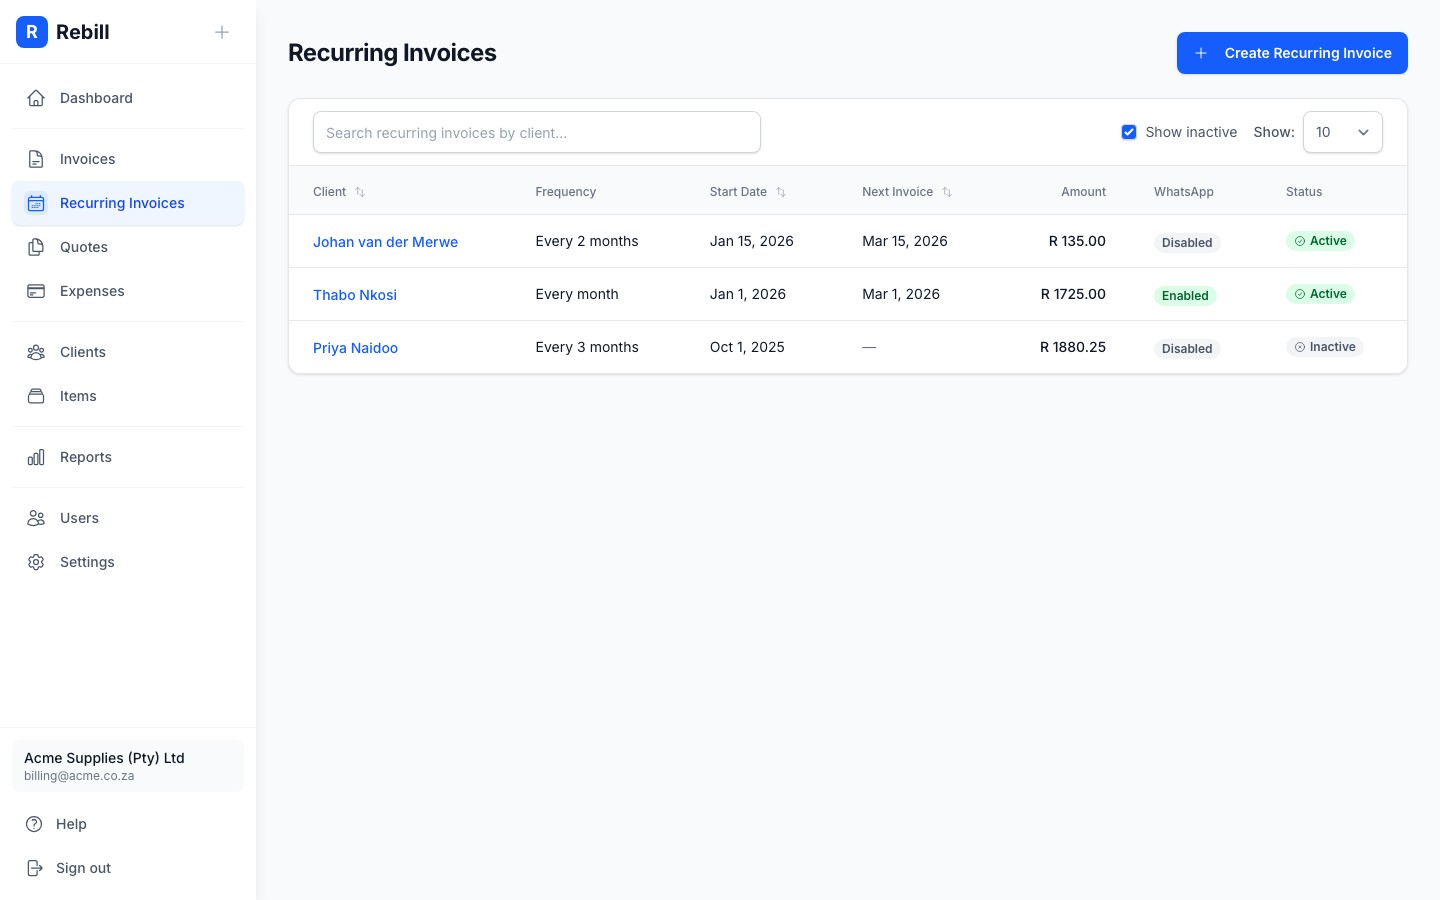
- 2
Select your client
Choose the client you want to set up the recurring invoice for.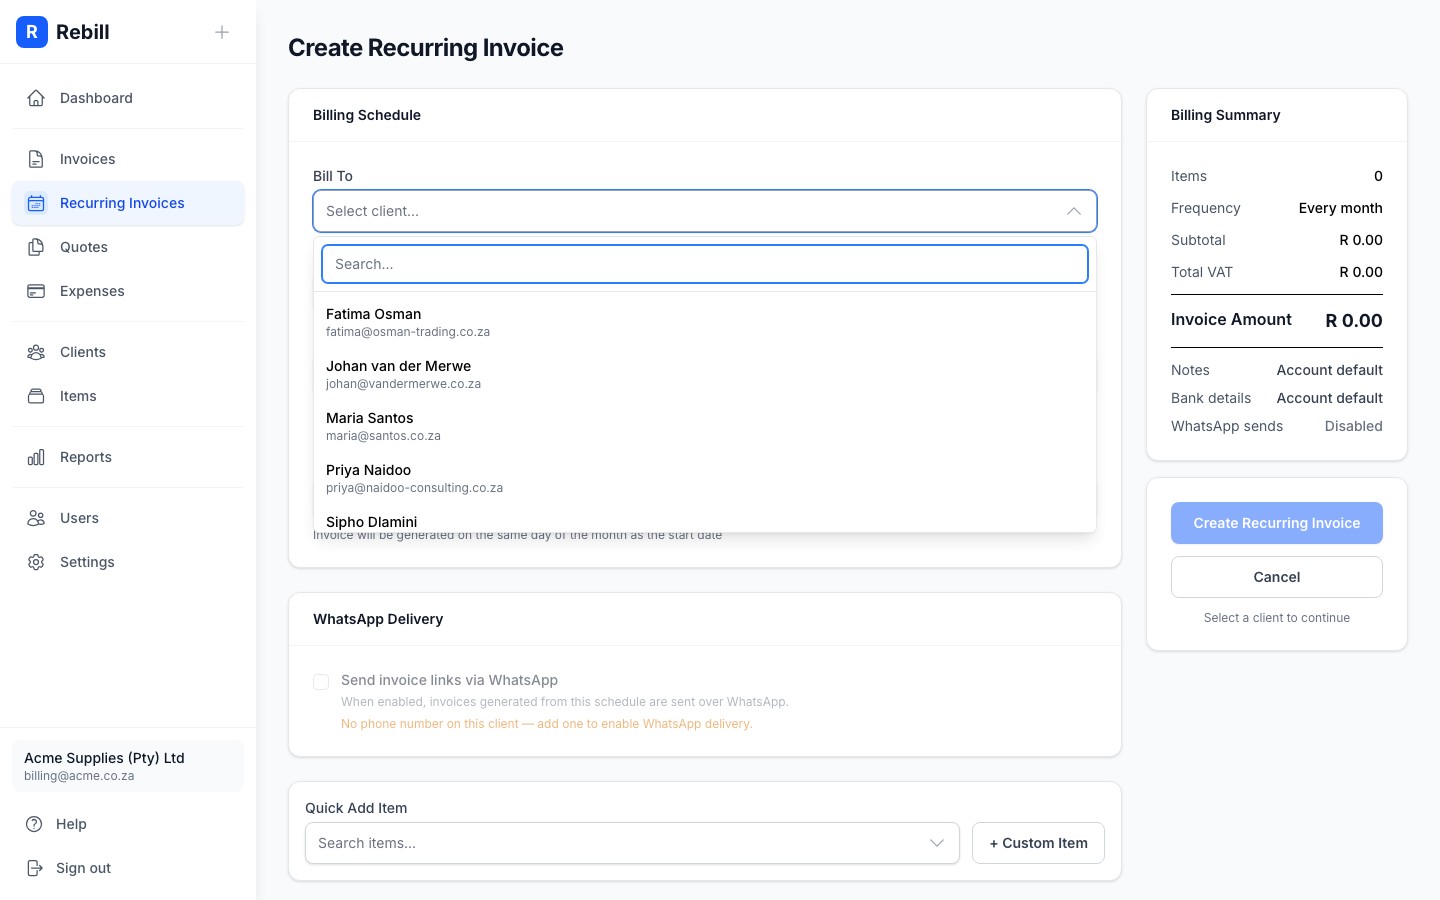
- 3
Set the billing schedule
Choose how often the invoice should be sent:- Frequency: Weekly, Fortnightly, Monthly, Quarterly, or Annually
- Start Date: the date of the first invoice
- End Date: optional. Leave blank to run indefinitely.
- Due Date: how many days after the invoice date payment is due (e.g. 30 days)

- 4
Add your line items
Add the items and services that will appear on every invoice. These stay the same each time unless you edit the recurring invoice.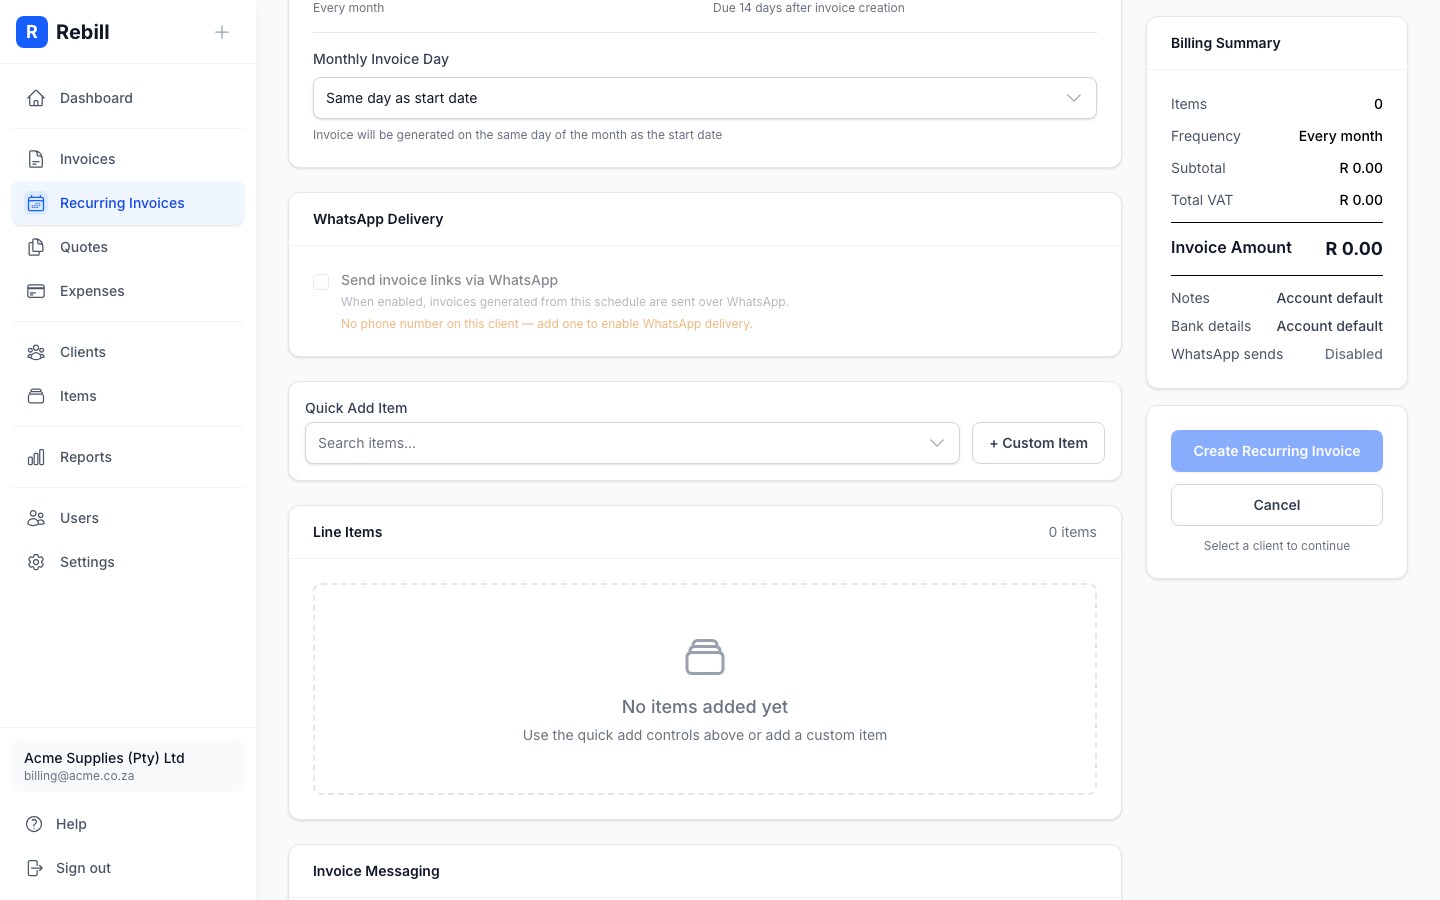
- 5
Enable WhatsApp delivery (optional)
If you're on Premium and have WhatsApp credits, you can toggle on WhatsApp Delivery to also send each invoice via WhatsApp automatically.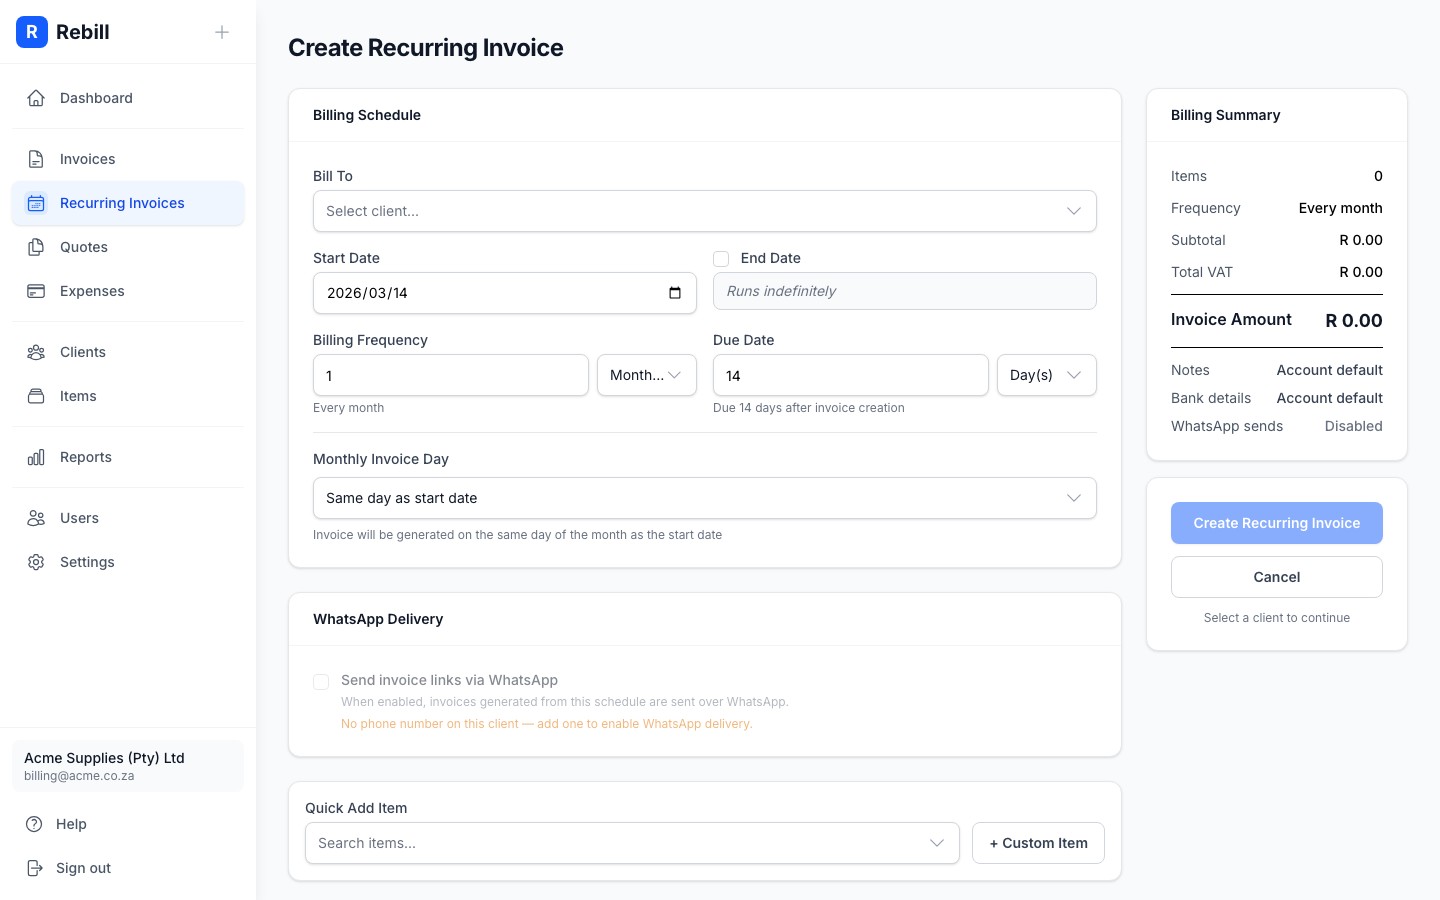
- 6
Save and activate
Click "Create Recurring Invoice". The recurring invoice will be created in an Inactive state. To start it, click the "Activate" button on the detail page.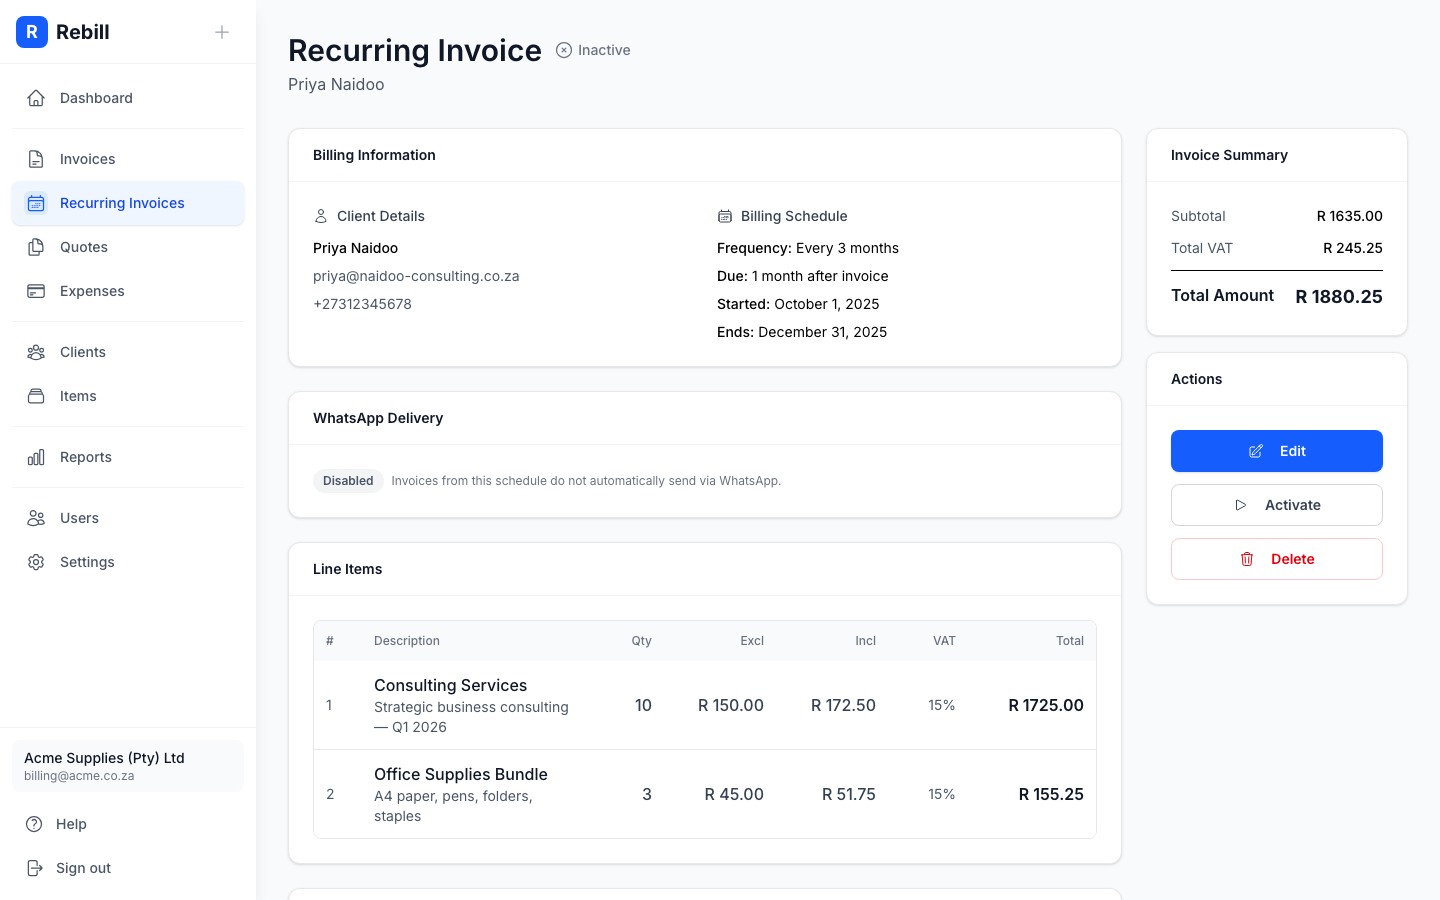
Tip
You can set up a recurring invoice in advance and activate it later. This is handy if you want to get everything ready before a new client's billing starts.